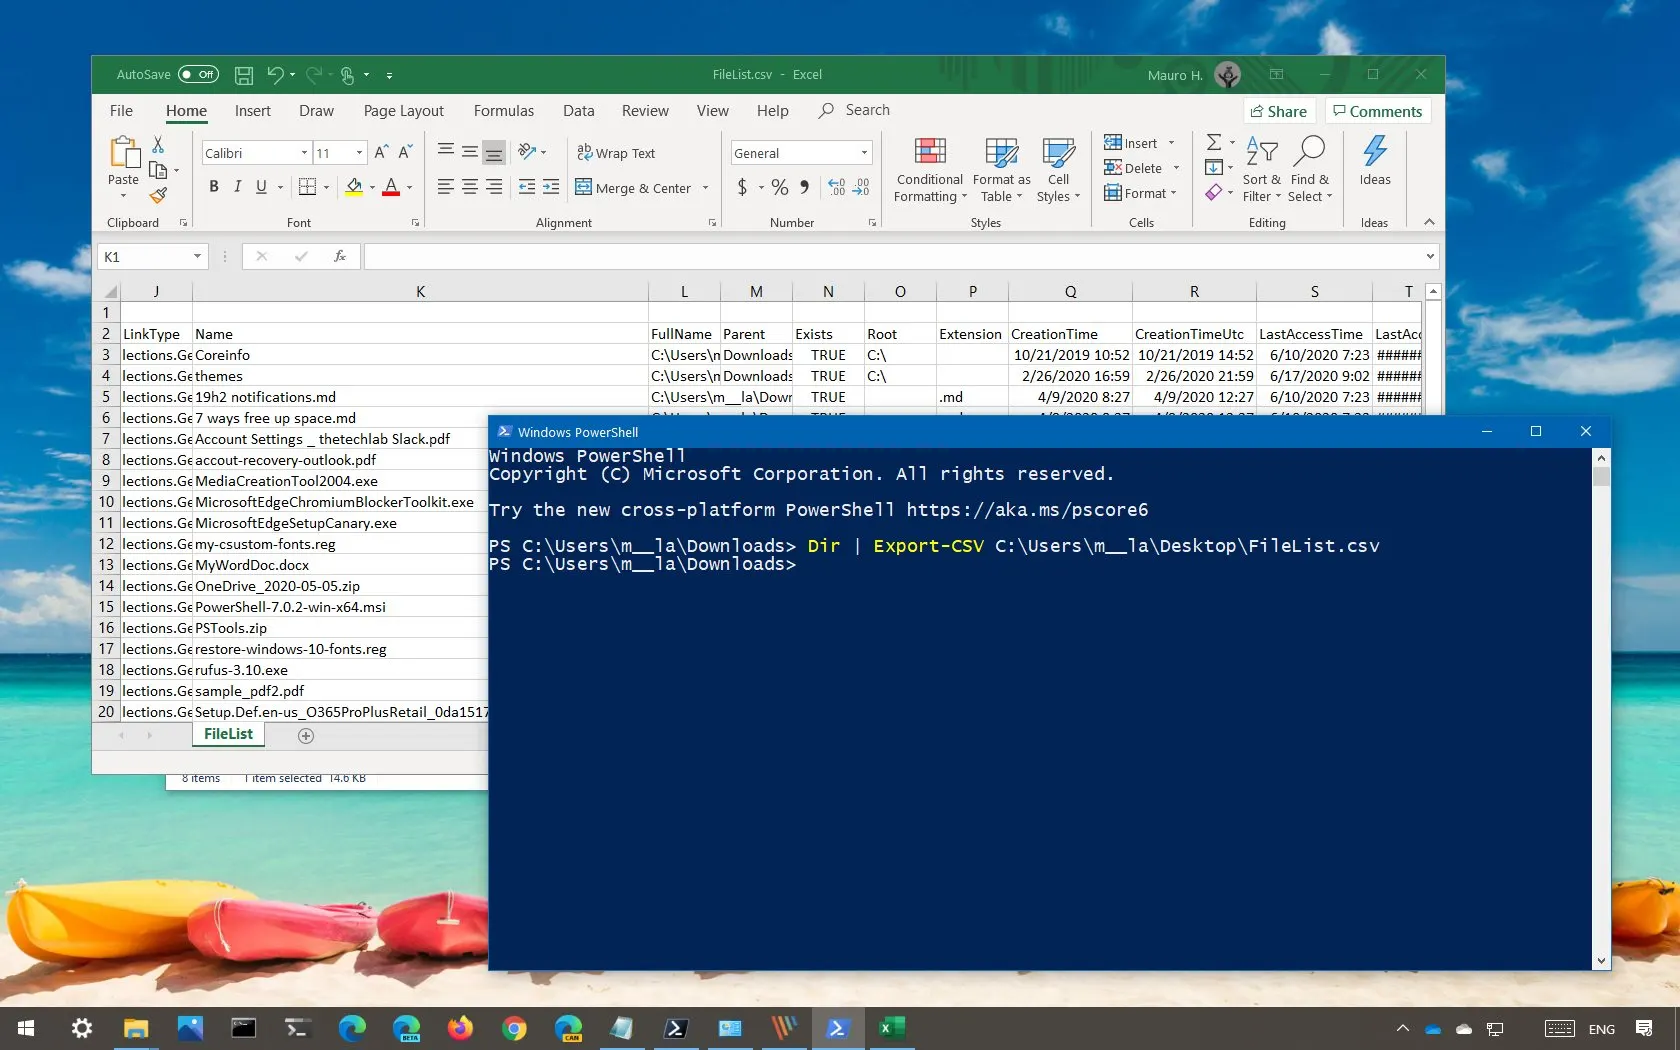
What this does
This PowerShell command exports results into a CSV file (which opens in Excel). It is one of the quickest ways to turn a command output into something you can share, attach to a ticket, or keep as evidence.
When you’d use this
- You need to send a list to a colleague or customer
- You want a repeatable report (disk space, users, services, etc.)
- You are documenting troubleshooting steps
- You want to compare results over time
PowerShell command (copy and paste)
This example exports running processes to a CSV on your Desktop:
Get-Process | Export-Csv "$env:USERPROFILE\Desktop\processes.csv" -NoTypeInformation
What the output means
- A file called processes.csv is created on your Desktop
- Open it in Excel to filter, sort, and search
- Each row is one item (in this example, one running process)
Common mistakes to avoid
- Forgetting where the file was saved (use Desktop while learning)
- Exporting too much data without selecting the key columns
- Opening the CSV while re-running the export (Excel can lock the file)
Efficiency tip (export only the useful columns)
This exports a cleaner report:
Get-Process |
Select-Object Name, Id, CPU, WorkingSet |
Export-Csv "$env:USERPROFILE\Desktop\processes-clean.csv" -NoTypeInformation
Efficiency tip (append results instead of overwriting)
If you want to keep adding to the same file (useful for daily checks):
Get-Process |
Select-Object Name, Id, CPU, WorkingSet |
Export-Csv "$env:USERPROFILE\Desktop\processes-history.csv" -NoTypeInformation -Append
Note: Appending works best when the columns stay the same each time.
Why this improves efficiency
- Turns technical output into a shareable report in seconds
- Creates consistent evidence for support and troubleshooting
- Makes it easy to track changes (before/after)
- Scales well for repeatable checks across users or devices