What this does
This PowerShell command quickly find the biggest files on your computer. It helps you identify what is using up disk space without manually searching through folders.
When you’d use this
- Disk space is running low
- A PC is slow due to a full drive
- Before clearing space or archiving data
- When File Explorer searches are taking too long
PowerShell command (copy and paste)
Get-ChildItem C:\ -Recurse -File |
Sort-Object Length -Descending |
Select-Object -First 10 Name, Length, FullName
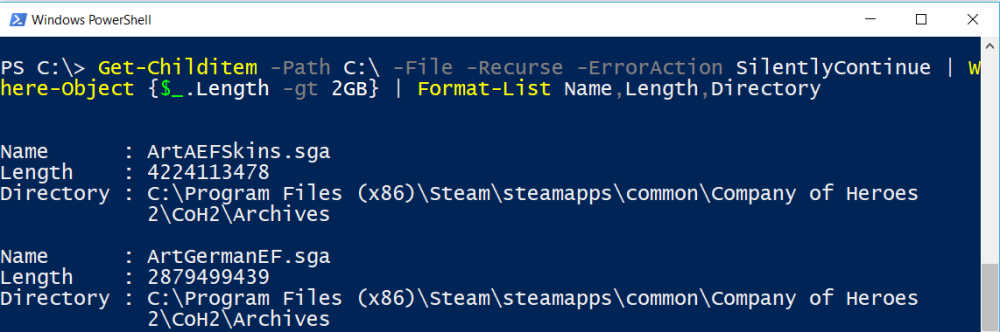
What the output means
- Name – the file name
- Length – file size (in bytes)
- FullName – the full path to the file
The largest files appear at the top of the list.
Common mistakes to avoid
- Running this on the entire C: drive on very large systems (it can take time)
- Forgetting some folders may be restricted without administrator access
- Deleting files without confirming what they are used for
Efficiency tip (show sizes in GB)
Get-ChildItem C:\ -Recurse -File |
Sort-Object Length -Descending |
Select-Object -First 10 Name,
@{Name="Size (GB)";Expression={[math]::Round($_.Length / 1GB, 2)}},
FullName
This makes the results far easier to read and explain.
Why this improves efficiency
- Much faster than clicking through folders
- Shows real storage usage, not estimates
- Ideal for remote support and cleanup checks
- Easily adjusted to any drive or folder